Jump to:
ToggleHow to Make a Journal: Step-by-Step DIY Guide for Beginners
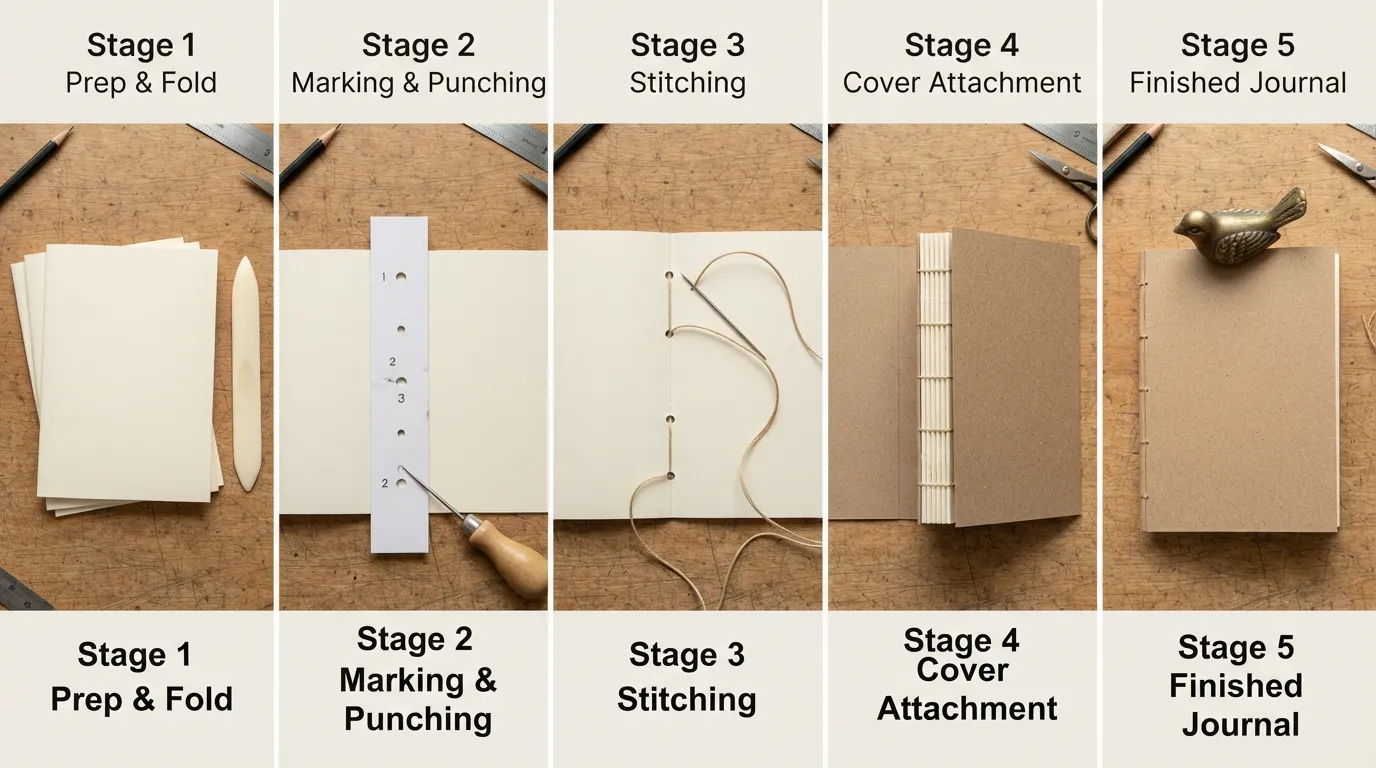
Why Make Your Own Journal Instead of Buying One
Building a journal at home bridges the gap between creative craft and intentional wellness. Beyond the sheer tactile satisfaction of bookbinding, making your own notebook solves two major hurdles people run into when trying to establish a regular writing practice: price and personal fit.
Cost savings vs store-bought
High-end journals with heavyweight paper and lay-flat binding can easily cost anywhere from $25 to $45 a piece. If you write daily, that habit gets expensive fast.
When you assemble your own notebook using basic printer stock, recycled cardstock, or drawing paper, your total material cost per journal usually drops under $3 to $5. You can repurpose cardboard cereal boxes for covers, use leftover embroidery floss for binding thread, and bind multiple 80-page volumes for the price of a single fancy notebook at a retail shop. That cost shift removes the perfectionism pressure. Knowing a notebook only cost you a few dollars and an hour at your kitchen table makes it much easier to write messily, spill coffee, and actually use the pages.
Customization benefits (size, paper type, cover design)
Commercial notebooks force you to adapt to whatever grid, paper thickness, or dimensions the manufacturer decided to produce. Making your own flips that balance completely in your favor:
Custom Paper Weight & Texture: Prefer heavy 140gsm watercolor paper for mixed-media journaling, or smooth 90gsm fountain-pen-friendly stock that doesn’t bleed? You get to hand-select every sheet.
Tailored Sizing: Standard A5 or composition sizes don’t fit every bag or nightstand. You can trim your signatures down to an ultra-portable 4×6-inch pocket size or expand to a wide 8×10-inch landscape format for morning brain dumps.
Intentional Cover Design: You can wrap your cover board in pressed leaves, thrifted linen, patterned paper, or plain kraft cardstock that you paint yourself.
This tactile personalization directly supports mental well-being. According to research on expressive writing and stress reduction, engaging in structured reflective writing actively lowers physiological stress levels. Having a physical object tailored precisely to your sensory preferences makes sitting down to write feel like an inviting ritual rather than a chore.
Materials & Tools You'll Need
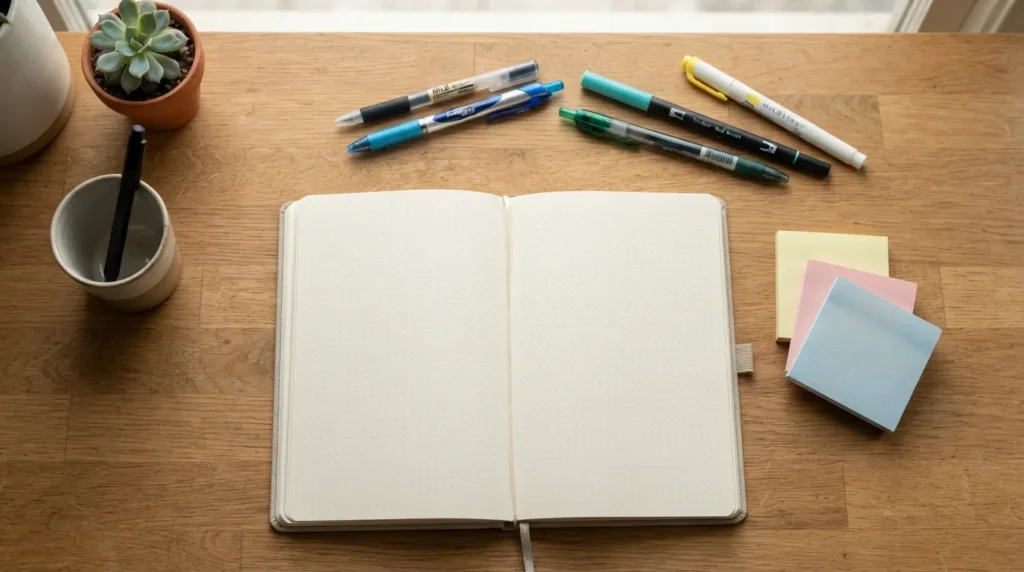
You don’t need a professional bookbindery to craft a beautiful, long-lasting notebook. In fact, most of the essentials are likely sitting in your home right now. Gathering your materials is the first step where the journal starts taking on its own unique personality.
Cover materials (chipboard, scrapbook paper, fabric, old book covers)
The cover sets the visual tone and protects your pages from daily wear. Choose something sturdy enough to hold its shape when tossed into a bag:
Chipboard / Binder Board: Standard 1.5mm to 2mm chipboard gives your journal that classic hardback feel. Cereal boxes or heavy shipping boxes are fantastic zero-cost alternatives.
Scrapbook Paper & Cardstock: Ideal for flexible softcover journals or for wrapping around chipboard to create custom cover art.
Fabric & Textiles: Thrifted linen, cotton remnants, or old denim make incredibly tactile, durable covers. Canvas is especially great if you want to paint your cover later.
Upcycled Hardcover Books: Thrift store books with damaged pages can be hollowed out, allowing you to reuse the vintage hardcover binding while filling it with fresh paper.
Inside page paper types + GSM guide
The paper inside should match how you plan to use your journal. Paper weight is measured in GSM (grams per square meter)—higher numbers mean thicker sheets:
| Paper Type | Weight (GSM) | Best Used For |
|---|---|---|
| Standard Copy Paper | 75 - 90 GSM | Daily fountain pen/ballpoint writing, quick brain dumps, pencil sketching |
| Heavy Drawing Paper | 100 - 120 GSM | Gel pens, light markers, mild highlighter use without bleed-through |
| Cardstock / Mixed Media | 160 - 200 GSM | Light watercolor washes, collage art, junk journaling, gluing photos |
| Watercolor Paper | 300 GSM | Heavy painting, gouache, wet media journaling |
Pro-Tip on Grain Direction: Paper has a hidden “grain” running in one direction. Always fold your paper along the grain rather than against it. Folding with the grain gives you smooth, flat pages, whereas folding against it results in cracked edges and pages that spring back open.
Essential tools (ruler, cutter, awl, bone folder, glue)
These five tools form your core bookbinding toolkit:
Metal Ruler: Plastic rulers chip easily when hit with a blade. A heavy cork-backed metal ruler keeps your cuts straight and safe.
Utility Knife or Precision Cutter: A fresh X-Acto blade or snap-off utility knife ensures clean, fray-free paper edges.
Awl (or Heavy Push Pin): Used for punching precise binding holes through paper signatures.
Bone Folder: A smooth plastic or real bone tool used to score and press bone-dry, crisp folds into your paper sheets. If you don’t have one, the back edge of a metal spoon works in a pinch.
PVA Glue or Heavy Duty Glue Stick: Bookbinding PVA glue dries flexible and archival-safe, preventing pages from cracking or yellowing over time.
Optional tools for advanced binding (needle, waxed thread, binding machine)
If you decide to step beyond quick fold-and-staple methods into traditional hand-stitching, having these extra supplies will make the process infinitely smoother:
Waxed Linen Thread: Waxed thread glides through paper holes effortlessly without tangling or tearing the paper fibers. You can wax standard embroidery floss yourself by pulling it across a block of beeswax.
Binder’s Needles: Size 18 or 20 blunt tapestry needles with large eyes make threading waxed cord simple without poking accidental holes in your pages.
Cincli or Comb Binding Machine: Great if you prefer spiral-bound or disc-bound layouts for lay-flat work notebooks.
How Many Pages/Sheets You’ll Need
In bookbinding, sheets of paper are folded in half to form groups called signatures (usually 4 to 6 folded sheets nested together). Because each sheet folded in half creates 4 writeable pages (front and back), the math is simple:
For a standard daily journal, 20 to 30 total sheets folded into signatures will yield 80 to 120 pages—which gives you plenty of space for several months of daily reflection without making the spine too bulky for a beginner stitch.
Choose Your Journal Type Before You Start
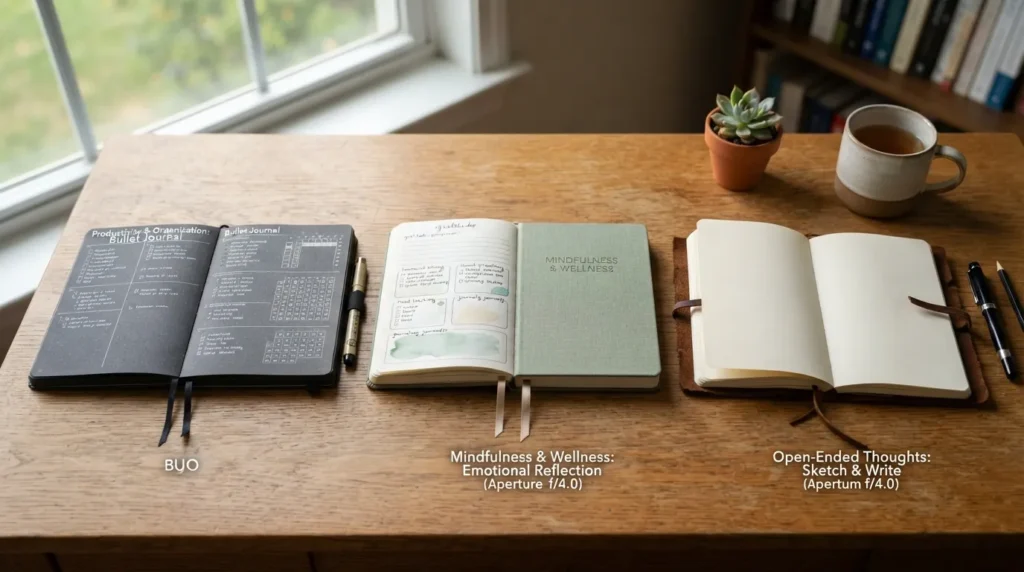
Before cutting paper or threading a needle, spend a moment thinking about how you actually plan to use your journal. The way you write or draw dictates the physical structure you will need—an art journal needs thick paper and room to expand, while a daily bullet journal needs page count and flat-opening pages.
Bullet Journal: Designed for daily planning, rapid logging, and habit tracking. Requires smooth, durable paper that resists ink bleed and handles frequent flipping.
Gratitude Journal: Built for brief, intentional daily reflections. Works best as a lightweight, accessible notebook that feels inviting to open every morning or night.
Art Journal: Crafted for wet media, acrylics, stamps, and heavy ink washes. Demands heavyweight paper stock and a sturdy spine that won’t warp under moisture.
Travel Journal: Meant to accompany you on the road. Needs a resilient, compact exterior cover that protects tickets, maps, and scribbled memories on the go.
Junk Journal: A creative, tactile collage book made from upcycled ephemera, vintage papers, lace, and pockets. Requires a flexible spine with extra breathing room to accommodate bulky layered pages.
Best size for each journal type
Choosing the right dimensions ensures your journal fits into your existing routine and physical space:
Bullet Journal: A5 (5.8 x 8.3 inches) is the universal favorite—it offers enough page real estate for complex monthly layouts while remaining portable.
Gratitude Journal: A6 or Pocket Size (4 x 6 inches) keeps the entry footprint approachable so daily practice never feels overwhelming.
Art Journal: Square (8 x 8 inches) or A4 (8.3 x 11.7 inches) provides wide, unrestricted space for bold brush strokes and open spreads.
Travel Journal: Standard Traveler Size (4.3 x 8.25 inches) slips comfortably into coat pockets, daypacks, and glove compartments.
Junk Journal: Custom Medium (6 x 9 inches) accommodates varied vintage paper cutouts, envelopes, and receipts without excessive trimming.
Best binding method for each type (short recommendation only)
Bullet Journal: Coptic or Kettle-Stitch Hand-Sewing — allows pages to lay completely flat on a desk so you can draw grid spreads across the spine seamlessly.
Gratitude Journal: Fold-and-Staple or Single-Signature Pamphlet Stitch — quick to assemble, clean, and ideal for low page-count notebooks.
Art Journal: Stab Binding or Tape Binding — provides rigid structural support for heavy cardstock and prevents wet watercolor sheets from tearing away from the spine.
Travel Journal: Elastic Traveler’s Notebook System — allows you to easily swap out filled paper inserts while keeping the outer leather or fabric cover intact.
Junk Journal: Loose 3-Hole Pamphlet Stitch with Accordion Spine — leaves extra “gator tooth” clearance so the book closes flat even when packed with thick collages.
Journal Examples for Inspiration
Sometimes seeing how different binding styles and materials come together is all it takes to spark your own design idea. Below are four distinct approaches to handmade journals, ranging from clean and functional to layered and artistic.
Minimalist Style
A clean, distraction-free option focused purely on function. Uses plain kraft cardstock for the cover, unlined cream paper inside, and a single fold-and-staple spine. Perfect if you want a fast, practical notebook for daily habit tracking or quick morning pages without fluff.
Hand-Stitched Style
Showcases exposed thread along the spine—such as a 3-hole pamphlet stitch or exposed Coptic weave. Often paired with heavyweight linen paper, deckle edges, or a supple leather/canvas cover. The hand-sewn spine allows pages to lie completely flat, making it ideal for deep reflective writing.
Junk Journal Style
Embraces creative chaos by mixing lined paper, music sheets, brown grocery bags, and thrifted book pages into eclectic signatures. Outfitted with fabric pockets, lace trims, and string ties, this style turns the physical journal into an interactive scrapbook for mental decompression.
No-Sew Style
Constructed using bookbinding tape, PVA adhesive, or wrapped chipboard covers. It mimics the look of a traditional hardcover book without requiring a needle or thread, offering a polished finish with minimal technical barrier to entry.
Quickest Method — Fold-and-Staple Mini Journal No Tools Needed
If you are looking for immediate gratification or want to make a light pocket notebook in under 10 minutes, the fold-and-staple method is your best starting point. It requires zero specialized bookbinding tools—just paper, cardstock, and a standard office stapler. This approach is ideal for testing out a new habit tracker, making a weekend travel booklet, or crafting a dedicated gratitude journal for your desk.
If you'd rather watch it in action, here's a quick walkthrough:
- Prepare and align your paper: Stack 5 to 8 sheets of standard paper together with 1 sheet of cardstock on the outside for your cover. Tap the stack gently against a flat table so all four edges line up cleanly.
- Fold the signature: Fold the entire stack in half lengthwise (short edge to short edge). Press firmly down the center fold using your thumb or the side of a marker to create a sharp, flat crease.
-
Staple down the spine: Open the booklet back up so the inner fold is facing up. Align a standard stapler along the center crease-line near the top (about 1 inch from the edge) and press down firmly. Repeat about 1 inch from the bottom edge.
Trick for standard staplers: If your stapler head can't reach the middle fold, open the stapler flat, place an eraser or foam block underneath your paper crease, press the staple through into the foam, and manually bend the staple prongs flat using a coin or ruler. - Trim the 'creep' edge: When multiple sheets are folded together, the inner pages push outward past the cover edge (a natural effect called "page creep"). Close your journal, lay a metal ruler along the front edge, and run a fresh utility knife down the line to trim all pages flush.
Crafter's Tip: Keep your sheet count under 10 pages (40 total writeable pages) for this method. Adding too many sheets causes the staples to pull through the cardstock spine over time, leading to loose inner pages.
How to Make a Journal with Simple Hand-Stitch Binding Pamphlet Stitch
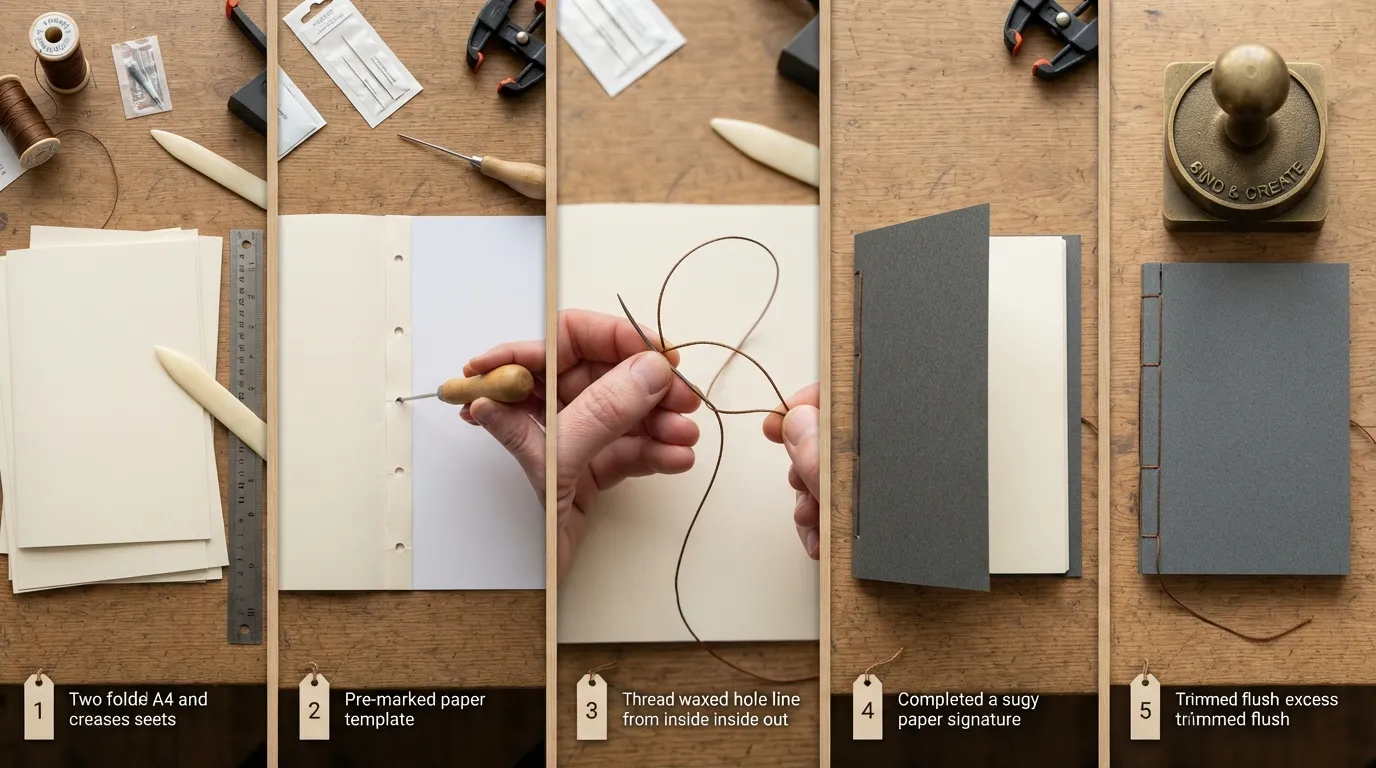
Step 1 — Fold and create signatures
Select your inner pages and fold each sheet individually in half using a bone folder for sharp, crisp creases.
Group 4 to 6 folded sheets together to form a balanced paper signature block.
Trim any uneven page edges along the outer margins to ensure a clean finish.
Step 2 — Punch holes correctly (odd number rule)
Create a paper punching guide matching the exact height of your journal’s spine fold.
Mark an odd number of holes along the crease line (3-hole or 5-hole setups work best for stability).
Use an awl to pierce clean, aligned holes directly through the centre crease of your signature.
Step 3 — Sew the pamphlet stitch
Thread a binder needle with waxed thread measured to roughly three times the height of your spine.
Begin stitching through the center hole from the inside, leaving a tail end for the final knot.
Weave in and out through the top and bottom holes, ensuring the long outer thread is straddled before tying securely.
Step 4 — Attach signatures to cover
Align your stitched signature directly with the corresponding pre-punched holes in your cover base.
Pass the binding thread through both the signature crease and the outer cover spine simultaneously.
Pull the thread taut to hold the signatures snugly against the cover without tearing the paper.
Step 5 — Press and flatten
Close the completed journal and place it under a heavy book stack or dedicated book press.
Leave it compressed overnight to set the spine fold and flatten the overall structure.
Trim any excess thread tails for a neat and professional finish.
How to Make a Journal from Recycled/Upcycled Materials
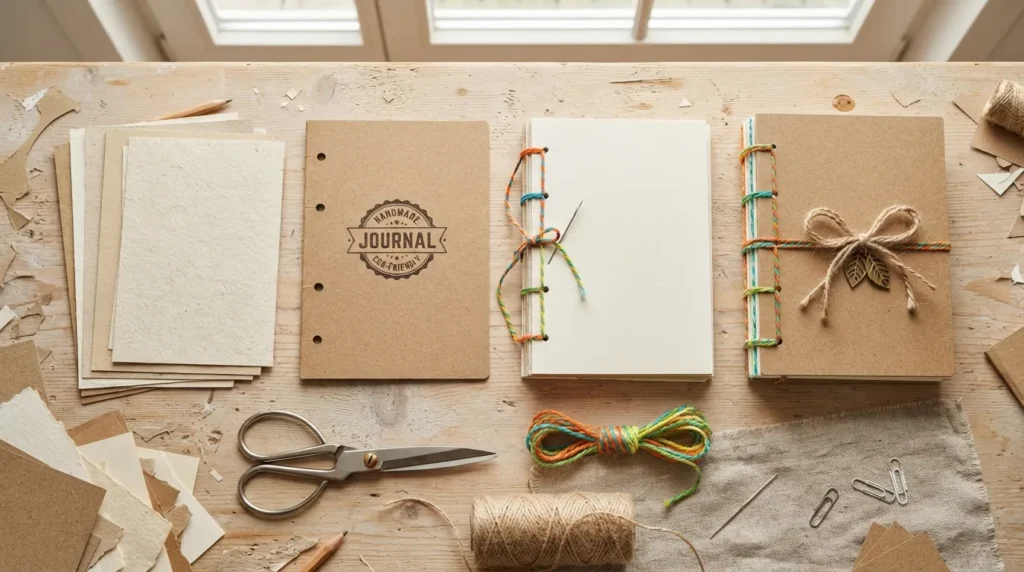
Old book cover / cereal box / envelope / scrap fabric covers
Step 1 — Choose and prepare your cover base Choose your upcycled base material. If using an old book cover, carefully hollow out a discarded hardback book by cutting along the inner hinges using a craft knife. For a cereal box cover, cut sturdy cardboard panels to form flexible front, back, and spine pieces. For envelopes or scrap fabric, layer mailers, fabric remnants, or old clothing to create a textured soft cover.
Step 2 — Gather and prep recycled interior pages Collect leftover notebook sheets, brown paper bags, junk mail, and vintage book pages. Trim all paper to uniform dimensions so they fit comfortably inside your chosen upcycled cover base. Group and fold pages into small signatures to prepare them for binding.
Step 3 — Reinforce cover folds and spine Apply masking tape, duct tape, or scrap fabric strips along the spine joints to prevent tearing over time. Seal porous cardstock or chipboard with a thin layer of PVA glue or Mod Podge for added durability. Allow the structure to dry completely under flat weights to prevent warping.
Step 4 — Bind pages into the upcycled cover Select your preferred assembly method such as a simple pamphlet stitch, elastic bands, or heavy-duty fabric hinges. Align the pre-punched paper signatures with the spine of your recycled cover. Secure the inner signatures tightly, ensuring even tension across all binding points.
Step 5 — Finish and decorate with upcycled accents Add junk journal embellishments like vintage stamps, ribbon tails, or cut-out book illustrations. Glue down decorative endpapers inside to cover raw cardboard edges and fabric seams. Attach a ribbon wrap, string, or button tie closure made from scrap materials to keep the journal shut.
Decorating Your Journal Cover
Bookplates, ribbons, pressed flowers, photos, stamps
Step 1 — Prepare the cover surface Ensure your journal cover is clean, dry, and flat before applying any decorative elements. If you are working with a porous material like fabric or raw cardboard, seal it with a light layer of Mod Podge or PVA glue to create a smooth, durable base for adhesives.
Step 2 — Arrange and composition design Lay out your decorative items like bookplates, ribbon trims, pressed flowers, vintage photos, and postal stamps on top of the cover before gluing anything down. Play with different layering options to find a visually balanced arrangement that suits your style.
Step 3 — Secure flat elements and photos Apply thin, even coats of craft adhesive or double-sided tape to attach paper photos, stamps, and background papers. Smooth down each piece carefully from the center outwards to eliminate air bubbles and prevent paper wrinkling.
Step 4 — Attach delicate pressed flowers and ribbons Use tweezers to carefully position dried, pressed flowers onto the cover, securing them with a delicate dab of clear-drying glue or a thin top seal of Mod Podge. Wrap ribbons around the edges or spine, gluing them securely along the interior fold lines.
Step 5 — Mount heavy accents and seal the cover Attach metal bookplates or heavier charms using a strong gel adhesive or small metal brads for extra hold. Once everything is in place, apply a final protective coat or sealant over the surface to protect delicate items from wear and moisture.
How Journaling Yourself Helps Build a Consistent Habit wellness-site differentiator
The psychology of self-made tools and follow-through
Creating your own journal introduces a powerful psychological principle known as the IKEA effect, where people place significantly higher value on things they build themselves. When you spend time folding, stitching, or gluing a custom journal, you develop a personal connection to the physical object. This sense of ownership drastically lowers the mental friction of opening the book each day, making you far more likely to stick with a daily writing habit compared to using a store-bought notebook.
Simple prompts to start using your handmade journal today
To break the fear of the blank page, start with effortless and low-pressure entries. Write down three things you are grateful for right now, describe the physical feeling of holding your new handmade journal, or list three small goals for the current week. Keeping initial entries short and achievable helps reinforce your new daily habit without overwhelming your routine.
🔗 Resource Link: To learn more about how small daily routines impact long-term mental well-being and habit formation, explore James Clear’s Research on Habit Formation.
FAQs
How to make a journal to sell
To create journals for commercial sale, design interior layouts and covers using tools like Canva, and utilize print-on-demand services like Amazon KDP or Etsy to manage fulfillment without holding inventory.
How to make a journal with paper and glue (no sewing)
Stack folded paper signatures and align them evenly along the spine. Apply a generous layer of bookbinding glue or PVA adhesive directly to the edge, attach a flexible fabric hinge strip, and press firmly under weights until set.
How to make a journal for school/students
Construct a simple journal using durable cardstock or recycled cereal box cardboard for covers. Insert lined paper signatures and bind them using a heavy-duty staple method or pamphlet stitch to ensure it withstands daily backpack wear.
How to make a journal example
A basic journal example consists of ten folded sheets of standard printer paper grouped into a single signature, encased inside a pre-folded cardstock cover, and secured with three center-aligned staple or thread stitches.
How to make a journal without buying tools
Utilize household materials by using a pushpin or safety pin instead of a craft awl, strong sewing thread instead of bookbinding cord, and a standard ruler or butter knife to crease paper folds sharply.
Lorem ipsum dolor sit amet, consectetur adipiscing elit. Ut elit tellus, luctus nec ullamcorper mattis, pulvinar dapibus leo.
Conclusion: Preserve Your Culinary Memories & Bring Your Recipe Book to Life
Creating your own journal is far more than a crafting project—it is a deeply personal process that transforms simple paper into a functional tool for self-reflection and daily habit building. Whether you chose a simple no-sew glue method, traditional pamphlet stitching, or upcycled materials, your finished journal is uniquely yours.
By combining the psychological benefits of self-made tools with flexible digital options like Canva, you now have everything you need to maintain a consistent writing routine or even design printable layouts for others.
Ready to Start Writing?
Pick Your First Prompt: Open your new journal today and write down three small goals or things you are grateful for.
Try Digital Customization: Experiment with layout templates in Canva if you want to expand into printable or sellable journal pages.
Share Your Creation: Keep building your collection using different textures, covers, and binding styles to suit your daily routines!
Pimchanok Srisuk
Pimchanok Srisuk is the Journaling Editor at Holistic Wellbeing Living. She writes about journaling prompts, reflective writing, emotional clarity, and mindful routines. With seven years of experience creating personal-growth content, Pimchanok helps readers use simple writing practices to understand their thoughts and make calmer everyday decisions.